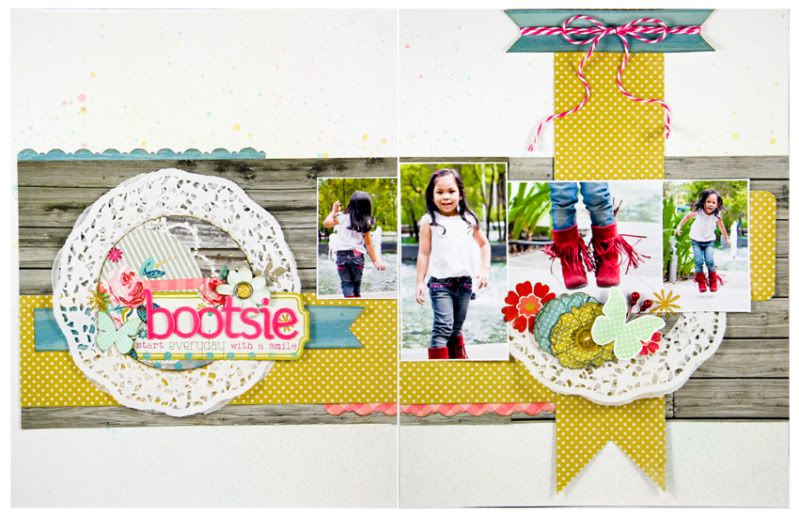
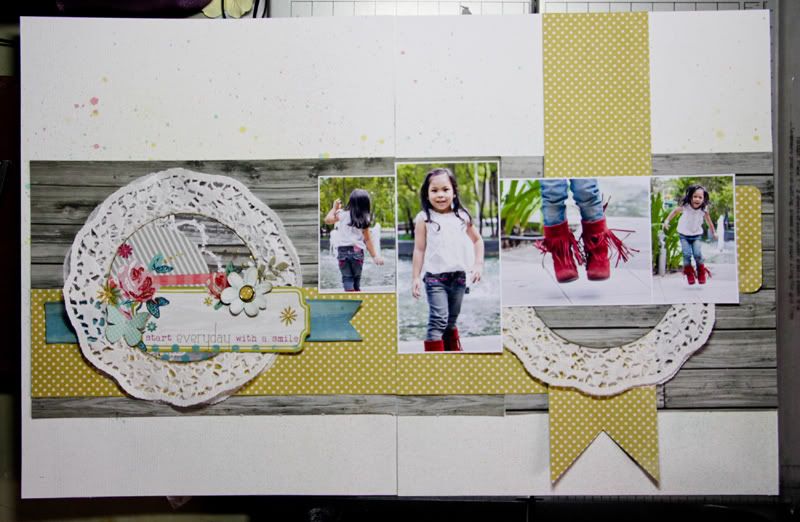
Hi ladies!!! LG here sharing with you my 2nd Double Page layout ever, using the gorgeous March kit.
To make my 2nd attempt of a double pager different from the first one I made last year, I used 8.5"x11" cardstock instead of the usual 12x12
Materials:
My Scrapbook Nook March Kit
8.5"x11" and 8"x11" Miss Caroline Day Worn patterned paper
2pcs 2"x10.5" Miss Caroline Favorite Decorate patterned paper
strip from Miss Caroline Favorite Madras patterned paper
strip from Miss Caroline Princess Lace patterned paper
Handcut the illustration from Miss Caroline Living Everyday patterned paper
Miss Caroline Living Rubons
Miss Caroline Cute Twine
Miss Caroline Day button & pins
Alpha
4 different sized photos
3pcs small doilies
2pcs 8.5x11 White Cardstock
border punch
mists
brad
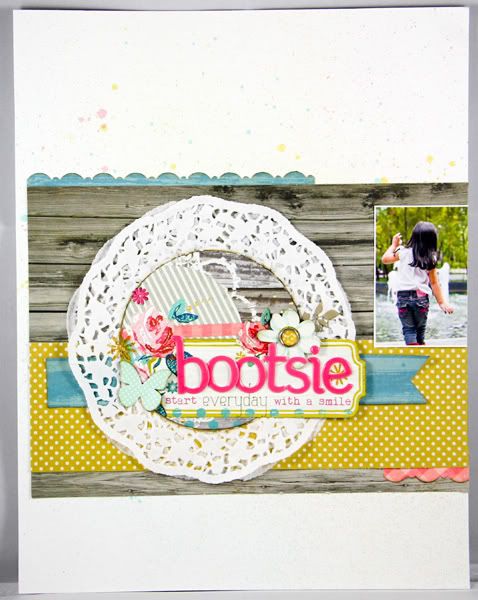
BACKGROUND: Randomly mist different pastel colors on both cardstock (put them side by side when you mist so that the flow of the color is continuous). To make your background cohesive with the kit, grab the dominant colors from the patterned papers you are using. Here I have used yellow, teal, apple green and pink.
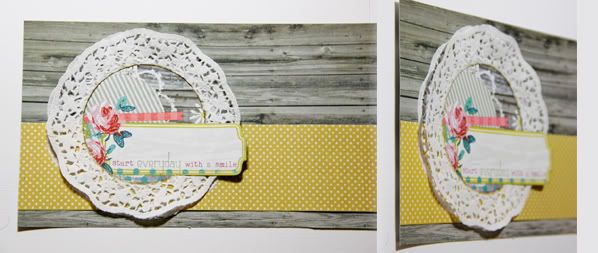
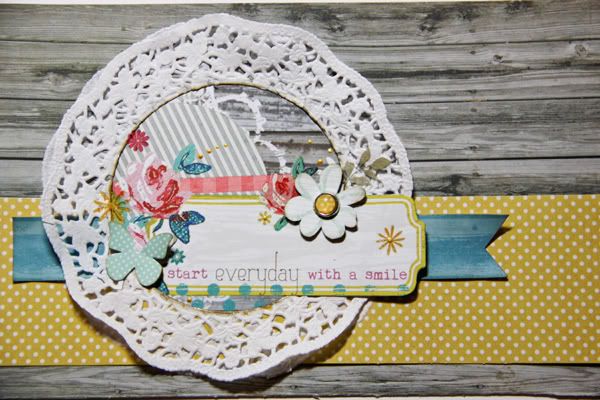
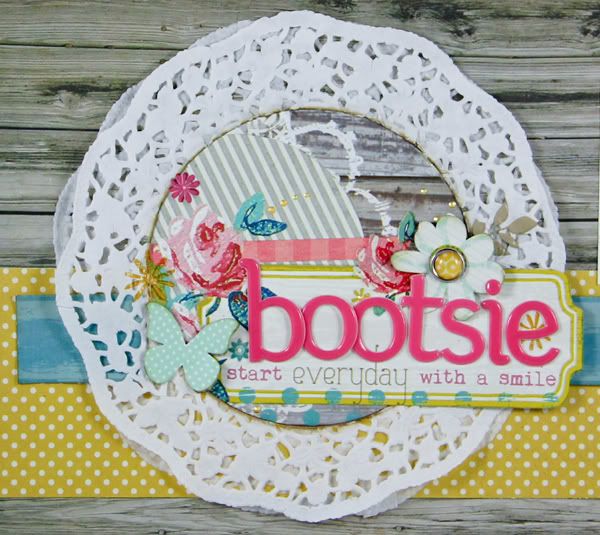
DESIGN: To achieve this layering, adhere 2 doilies, the 2"x10.5" yellow patterned paper over the 8"x11" Worn patterned as seen below. Then using a diecut machine and a medium size circle diecut template, punch a whole in the middle of the doilies. Use the handcut image from Everyday patterned paper to patch it through.
Continue embellishing this part by adding the rubons, handcut flower and butterfly, brad, and a small strip banner from Madras patterned paper.
Add your title on the journaling spot using the alpha that came with the kit
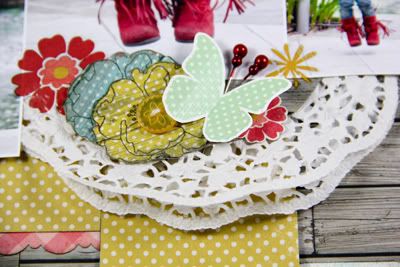
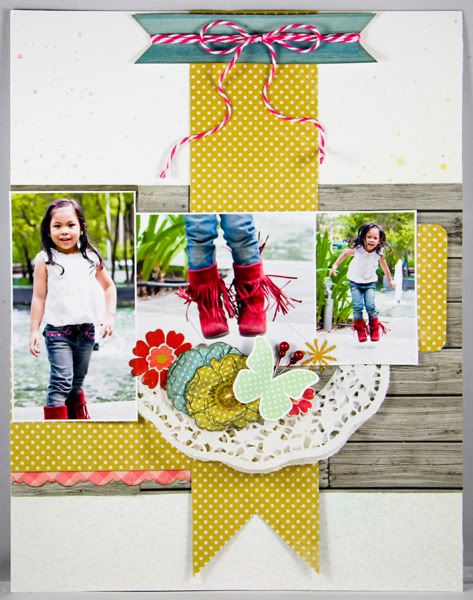
LAYOUT: To make it easier for you to layout everything, make sure that the 2 cardstocks are placed side by side. Think of it as one long spread. Adhere the other Worn patterned papers on both cardstock making sure that they are aligned together. Add the other yellow patterned paper strip vertically at the 2nd cardstock. Underneath the 3rd photo is a half folded doily.
TIP: If you are familiar with any design editing software like Photoshop, create a dummy layout on it and drag and resize your photos in it. You can do this by simply starting a new file and make sure that the size of spread is equal to your actual layout (I did mine at 17"x11"). This will help you plan the right size of photos to use.
Embellish the half sized doily by adding rubons, handcut flowers (leftover Decorate patterned paper), butterfly, and pins
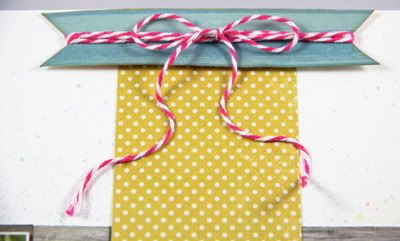
Wrap around the twine and make a ribbon on the blue strip patterned paper designed as a banner. Adhere this at the top over the vertically aligned yellow patterned paper.
FINAL TOUCHES: Add a few strips of borders randomly to add color
There you have it! I hope you enjoyed my class as much as I did!

About Us


12 Month Membership (Receive 13th Month FREE)
My Scrapbook Nook kits are loaded with the latest and greatest products in the scrapping industry, always balanced and creatively designed to help you in your creative journey! We draw from a variety of manufacturers, favoring textures, patterns and concepts that compliment and enhance the paper line of the month. The kits are one of the best deals in the industry as we load them up with as much scrappy goodness as we can find, and always charge only $29.50! If you sign up for a 12 month subscription you'll get a free kit after your 12 month mark! Now that's a bakers dozen of goodness!Friends of the Nook Badge!

Links


The Nook Grab Bags!

Must Read
-
Welcome to the My Scrapbook Nook Spring Blog Hop! Thanks for stopping by! Hiding among the blogs from the list below are 5 prizes and one H...
-
Here we are with the finalist's takes on Challenge 2! Please view the three cards below and follow the directions to pick your winner! ...
-
want to be our friend? snag the cute button in our sidebar for your very own! when you post it on your blog, leave us a comment here wit...
-
good morning everyone! twice a week, we will be featuring challenges from our celebrate summer crop . today, i am sharing my challenge,...
-
I was asked by a former Nook DT, Tanya if I am interested to apply for the Nook. She mentioned that they are looking for card makers. I wa...


3 comments:
absolutely love this LG, great class♥
A creative design and paperwork.
plastic card
plastic cards
Fabulous 2 pager LG!! LOVE your design, title and those photos!!!!
Post a Comment